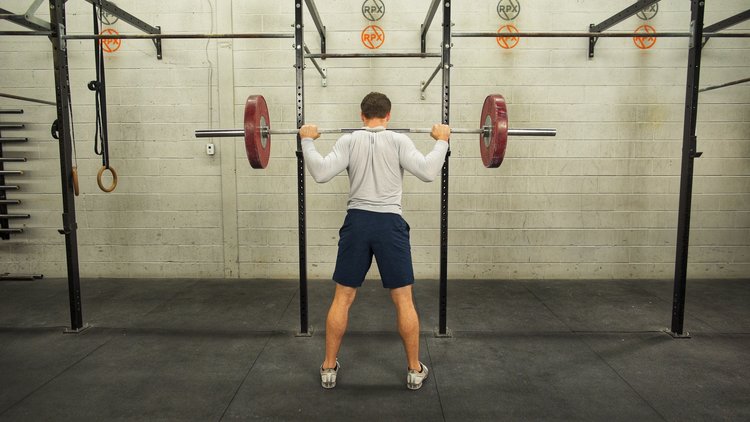
The squat is considered by many to be the king of all exercises. It is about as fundamental as it gets in terms of movement patterns, and can be done in a variety of ways. Proper set up along with optimal movement mechanics are needed for such a demanding exercise in order to get the most out of it.
The back squat is one of those exercises that, when performed correctly, can serve as an effective tool to develop overall strength, athletic performance, and muscle density. When performed incorrectly, it can eventually lead to injuries, regression, and/or imbalances.
There are cues I use for clients and myself when performing back squats for optimal positioning and execution. Try these cues next time you’re in the gym and watch your squats skyrocket.
1. Big chest, tight back
Although back squats obviously rely predominately on your legs, you can’t neglect upper body engagement at all. Where is the bar resting after all? You want to think proud chest and optimal thoracic extension to create a strong support system in the upper back. With a collapsed chest and rounded upper back, your body is put out of position before you even squat. When you grip the barbell, think pulling your back into the bar.
2. Big air
Big air and brace the core. Core engagement during compound movements like squats and deadlifts are a necessity, not an afterthought. This goes back to my point of full body engagement rather than neglecting the supportive muscle groups. Breathe in through the belly, hold and draw your belly button in to the lower back. This diaphragmatic breathing technique activates the core muscles and helps create a strong support system for the lumbar spine (lower back).
3. Bend at the knees, push the hips back
Initiate the squat by first bending at the knees and pushing the hips back as if you’re sitting in a chair. You want the majority of the pressure on your heels when sitting down into the squat in order to load and engage your glutes. Think ‘rooting your feet through the floor’ with the three balls of your feet (heel, under big toe and under small toe) with roughly 70% pressure on the heels and 30% pressure on the front of the foot.
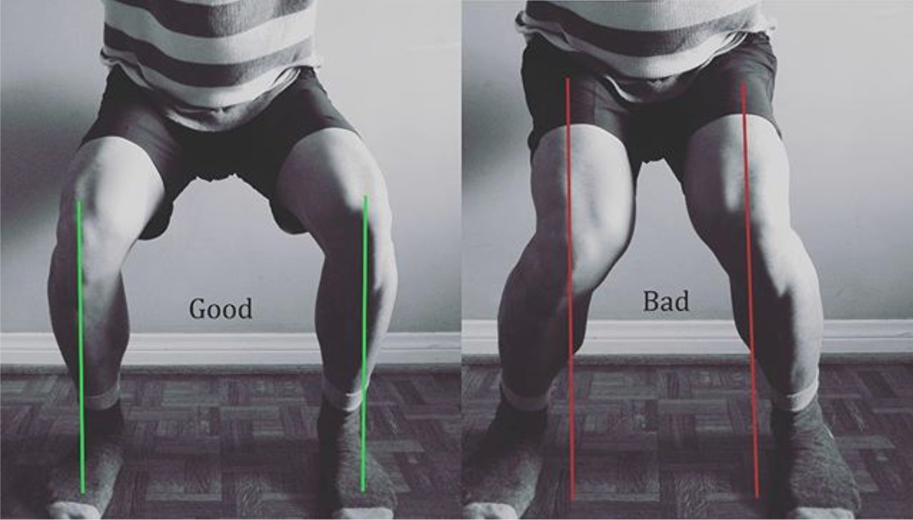
4. Spread the floor
You’ve probably heard ‘push your knees out’ if anyones tried showing you how to squat before. This is fine, but sometimes it overemphasizes lateral movement in the knees rather than stability and drive through the floor. Simply pushing your knees out to the side isn’t going to make your squat any better. If you just push your knees out, your feet shift and lose all stability from the floor (which is pretty damn important when you’re squatting). In order to eliminate valgus collapse (see image below), try thinking of it this way. Imagine you’re standing on a sheet of paper next time you squat. When you get to the bottom position and it’s time to drive up, imagine you are spreading the floor apart with your feet and trying to rip that sheet of paper apart. This helps reinforce driving through the floor and engages the glutes while maintaining strong knees and eliminating valgus collapse.
5. Push shoulders into the bar
Similar to when you’re setting yourself up in the squat, you want to push your upper back into the bar when driving up. This allows you to maintain optimal thoracic extension and engagement in the upper extremities.
The back squat is one of those exercises that need to be taken seriously when performing due to the direct implications it has on your performance. Try implementing these cues in your own workouts or with your clients next leg day!